also dairy free & vegan!
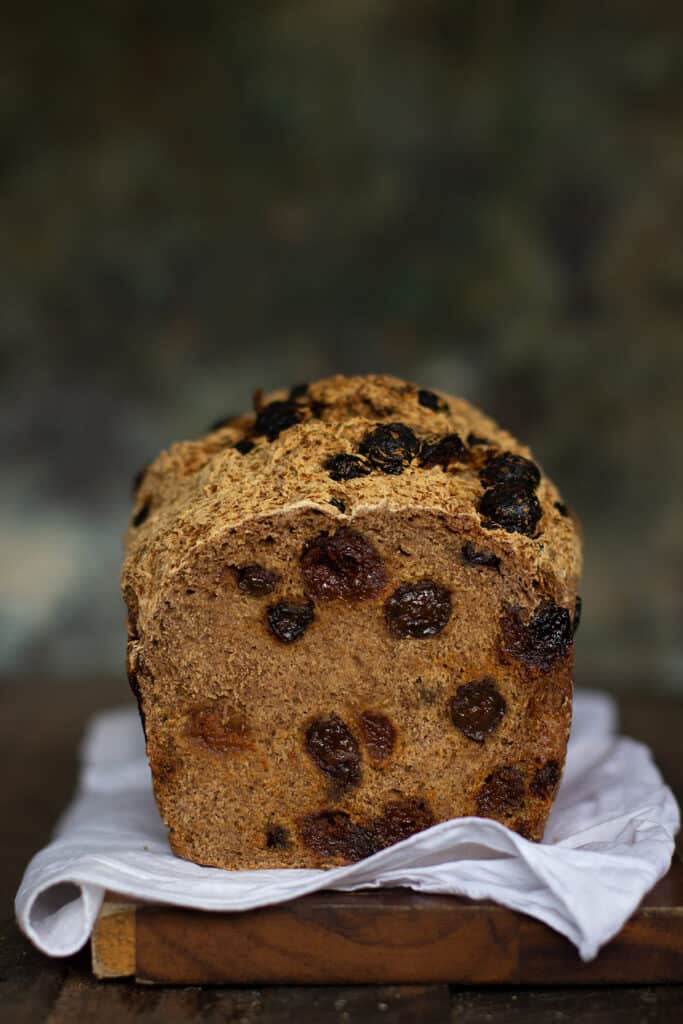
I’m absolutely delighted to bring you this recipe for Gluten Free Fruit Bread. To date, I don’t think I have created a bread with such impressive height, let alone the aroma as it bakes. A loaf of bread baking in the oven is a unique smell on its own and not one to be missed. Yet, add on top of this sweet spices and caramelising dried fruit and you have a house filled with scented delights.
Do I have your attention? Lets bake!
The base of this Gluten Free Fruit Bread is adapted from The Best Gluten Free Bread. I’ve been pondering on making this rendition ever since coming up with the original recipe. With Easter just passed I had planned on making my Hot Cross Buns and had even pulled out all the ingredients from the pantry ready to go. However between Hubbard starting a new job, a long run and the blink of an eye Easter day had passed without a Hot Cross Bun in sight.
Since the ingredients were still pulled out chaotically with all good intentions, I took it as a sign to get my act together and finally make this fruit bread. I also know I didn’t want any nuts or seeds, just a purist fruit bread.
My intension was to also go big. I love the rise that you can achieve with any of my gluten free breads inclusive of the original Gut Friendly Bread. But this time I wanted a loaf that stood high like the ones you see at your local baker. A loaf that as you slice it the sliced piece topples over threatening to break under its own shear weight. This meant going in unabashedly hard with an abundance of not only flours, but tonnes of psyllium, raising agents and more.
When you make a commitment like this with recipe creating there is always a chance that you are going to waste your ingredients. You don’t know the outcome. No one has come before you and written you guidelines. Its a jump off a cliff as far as risk verses reward. I know we are only talking about some pantry ingredients, but trust me when I say the heart ache and mental knock of a failed recipe and wasted food is still pretty harsh. I’ve had my fair share of melt downs in the arena.
Suffice to say, this risk was worth it. I pretty much cleaned out all my pantry jars of baking ingredients, but the triumph was this glorious Gluten Free Fruit Bread. Its plump raisins popping out the top of the loaf when I opened the oven were like a cherry on top of a cake. I may have even excitedly clapped my hands and jumped up and down on the spot like a ecstatic fool.
The hardest part about this Gluten Free Fruit Bread once its cooked is (ideally) leaving it to set and ‘cure’ for lack of a better word. I mean its not the end of the world if you hacked a piece straight off the end of the loaf, however it is best when left to rest overnight before slicing. Good luck with that – its the hardest part of the entire recipe process.
Common fruit bread baking recipe adaption questions
Whenever I post a baking recipe the most common questions surround swaps for flours and raising agents that people may not have in their pantry. So, in advance, here are some suggestions for adaptions or swaps for this gluten free fruit bread:
- Sorghum flour – I buy mine readily from my local health food store in bulk. I also used to get it really easy at The Source Bulk Foods. If you are struggling to find sorghum flour you could swap it for buckwheat flour or millet or even brown rice flour. Keep in mind this will change the taste and texture of the bread depending on the flour you use, as sorghum flour is a more neutral flavour.
- Tapioca flour – if you would like to swap this flour I would recommend at least a lighter flour option like potato starch, rice flour, perhaps even millet flour. Tapioca provides a lightness to the bread and also helps with the stickiness of the mixture. Again, if you make this swap you will see a change in the density of the bread and flavour.
- Cream of tartar – if you do not have this ingredient I would recommend adding another 1/4 tsp of bicarbonate soda to help with the rise of the bread.
- Psyllium husk – this ingredient is essential. Please do not try and make this bread without psyllium husk as it will not work!
- Dried fruit – you can absolutely add other dried fruits instead of the ones used here. Dates would be amazing, so would sultanas, figs or dried pears. Honestly you cannot go wrong.
If you have any more questions abut modifying this recipe, be sure to leave a comment below. I am always happy to help out and find a ingredient sub or tweak to make it work for you. Did you know our clinic specialises in gut health nutrition? Learn more here.
Enjoy! x
Like what you’re seeing? Subscribe for new recipes and nutrition tips every week!
Need personalised nutrition advice catered to your needs?
If you are after personalised nutrition advice and dietary planning individualised to your health and dietary needs then contact us at The JCN Clinic with your enquiry. We are always happy to answer any questions you have!

Gluten Free Fruit Bread
- serves
- makes 18 slices
- preparation time
- 15 min
- cooking time
- 90 min
ingredients
- 1/2 cup psyllium husk
- 4 & 1/2 cup water + 2 tbsp
- 3 cup brown rice flour
- 2/3 cup tapioca flour
- 1 cup sorghum flour
- 1 cup buckwheat flour
- 4 teaspoons baking powder
- 1 teaspoon bicarbonate soda
- 1 teaspoon cream of tartar
- 1 teaspoon salt
- 2 teaspoons cinnamon
- 2 teaspoons all spice
- 1 cup raisins
- 1 cup dried apricots (sulfur free if possible)
- 2 teaspoons apple cider vinegar
- 2 tablespoons molasses
method
Please see notes above on my recommendations for adaptions and swaps for this gluten free fruit bread recipe. The bread baking tin used is 24cm L x 14cm W x 7.5cm D.
This bread was adapted from The Best Gluten Free Bread.
- Preheat oven to 180c, fan forced.
- In medium sized bowl mix the psyllium husk with the water and set aside. It will form into a gel over the next 10 -15 minutes.
- In a large mixing bowl combine the brown rice flour, tapioca flour, sorghum flour, buckwheat flour, baking powder, bicarbonate soda, cream of tartar and salt. Mix well.
- Add the raisins and dried apricots and mix through.
- Line a large loaf tin with baking paper and set aside ready for the mix.
- Add the apple cider vinegar and molasses to the psyllium gel mix and whisk in.
- Make a well in the centre of the flour mix and pour in the psyllium gel. Mix well with a wooden spoon bringing the mix together.
- After the mix has come together use your hands to form into a ball and gentle knead together for a few minutes. The dough should be a little sticky but should hold together well. If it seems too wet add a touch of flour. Conversely if it seems to dry add a touch of water.
- Make a rough loaf shape (like an oval) with the dough and then place the dough into the loaf tin. Use your hands to push it into the corners.
- Place in the oven for 90 minutes checking at the 60 minute mark. If you feel the bread is browning too quickly cover the top with a piece of baking paper.
- Remove the bread from the oven and allow to cool in the tin for 10 minutes. Once it has cooled down, gentle flip upside down on a wire rack to remove from the tin. Turn the bread up the right way again and leave to cool, ideally before slicing. In saying this, you should be able to slice a piece off to eat straight away if you want to tuck in!
- Store your Gluten Free Fruit Bread in an airtight container for up to 2 days, or in the fridge for 5 days. Ideally cut up while fresh on day 1 or 2 to maintain freshness to the bread.
nutritional information for Gluten Free Fruit Bread
Nutritional information based on 1 slice.
| Calories/KJ | 230 cal/962 kj |
| Total Fat | 1g |
| Saturated Fat | 0g |
| Total Carbohydrates | 52g |
| Sugars | 11g |
| Fibre | 8g |
| Protein | 4g |
Jessica Cox is a qualified practicing Nutritionist with a Bachelor Health Science (Nutrition) and over 15 years of clinical experience. She is the founder and director JCN Clinic, published author and established recipe developer. Jessica is well respected within health and wellness space for her no fad approach and use of evidence-based nutrition.



Hi is your nutritional information per slice. It says nutritional info for one cup.
Oppps! Thanks Cathie, this has been edited. The nutritional information is correct but its definitely for 1 slice, not 1 cup! That was a duplicate from another post. 😉
Hi Jessica, this bread sound awesome. What size pan did you use? It seems like a standard loaf pan (9×5) will be too small for the amount of dry ingredients. Thanks, Linda
Hi Linda. Its very delicious I can promise! The bread pan I used is 24cm L x 14cm W x 7.5cm D. Coles sells as a Cook and Dine Loaf tin.
Hi Jessica
What would you use instead of brown rice flour? Would you make a different mix of tapioca, buckwheat and sorghum? Or may be add some millet?
I have tried your best ever gluten free bread by replacing the brown rice flour with a mix of the three others. It turned out pretty good, a bit crumbly on the outside and may be more in the Irish soda bread style in flavour but still delicious 🙂 may be I didn’t have quite enough psyllium husks in it (I used about 22g)
Many thanks in advance
Hi Alexandra, I’d say if you are going to swap the brown rice flour then buckwheat flour or more sorghum would be the best options. Definitely not tapioca. Also, the amount of psyllium is really important to create the right texture. I think once you get this spot on with amounts you will not have any issues. Good luck and let me know if you have any other issues.